Wednesday, September 25, 2019

Creating Your Colorado-friendly Garden: 2.b - Site Physical Assessment


In this post, we continue to explore the steps required to create a Colorado-friendly garden. In the last post, we discussed how to discover the characteristics of your garden’s soil.  In this post, we consider other physical factors that affect your garden design.  For a list of all the posts in this series see the page ‘Creating Your Colorado-friendly Garden’ (right).


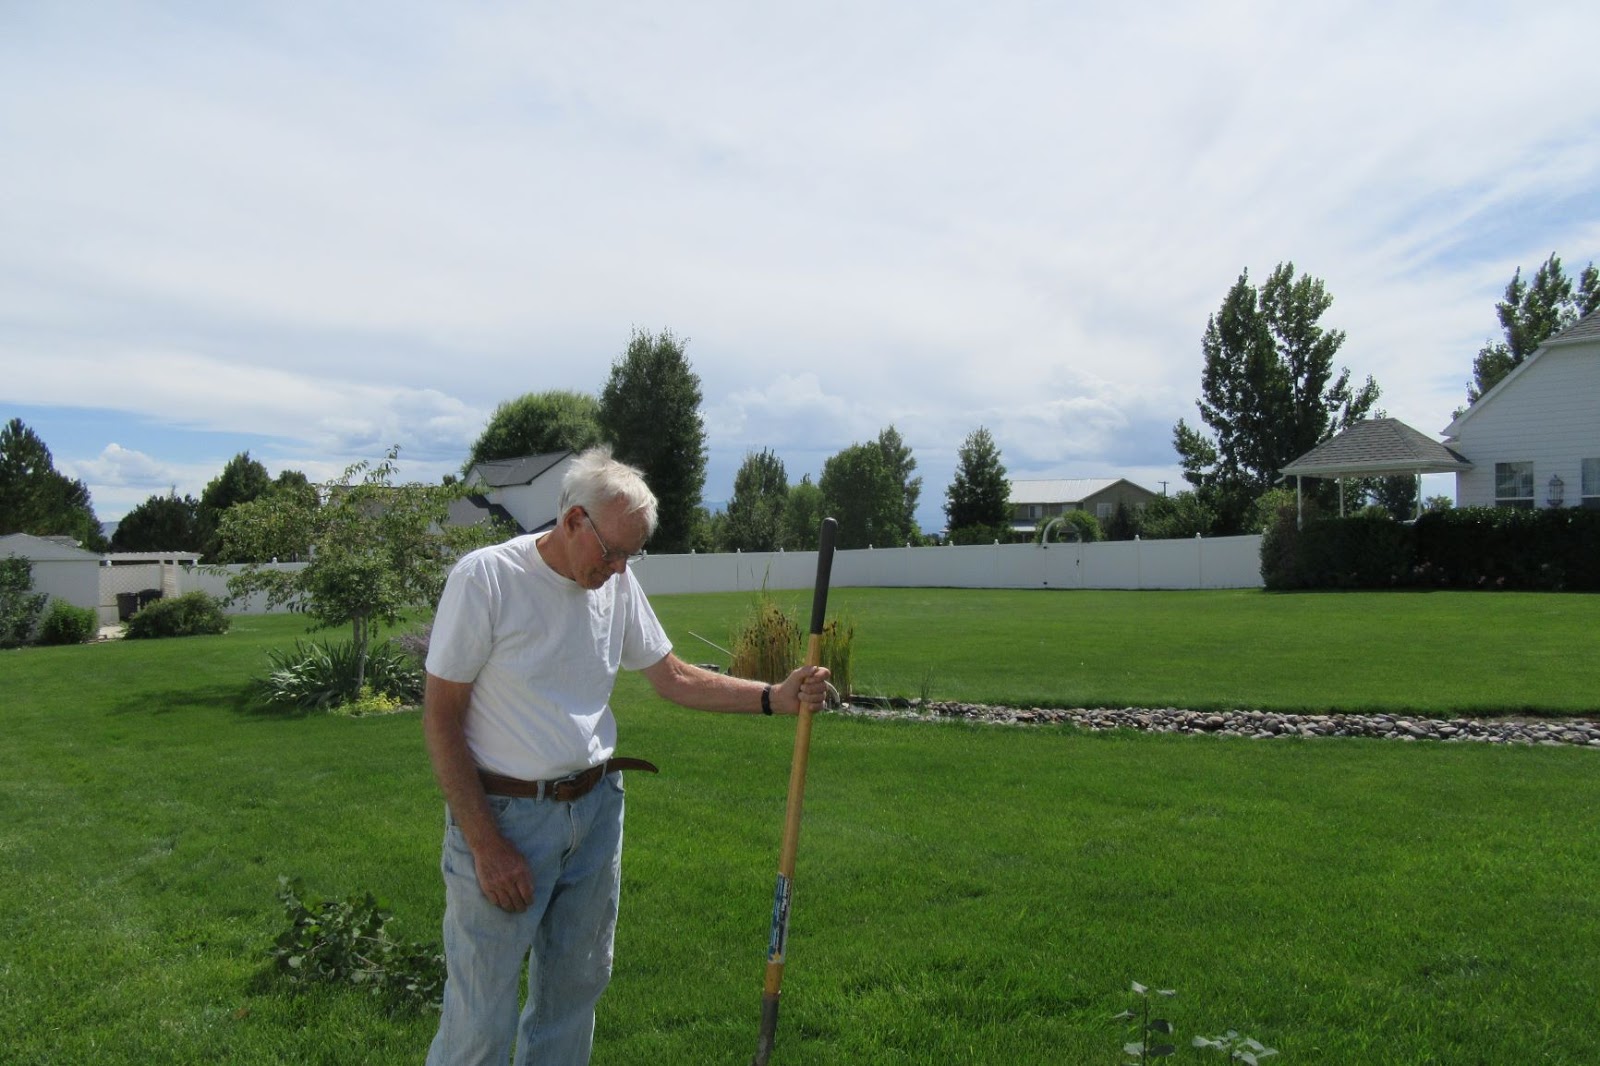
Measuring precipitation in your own yard: good idea


1. Yearly Precipitation

Nothing influences plant growth like the amount and pattern of precipitation. You probably have a basic understanding of precipitation in your area. But as climate changes, and water becomes more scarce (at least in the U.S. Southwest), you need to take a careful look at precipitation patterns over time.

Yearly climate data is readily available on the internet. Local television channels or the Weather Channel have some good information on average temperature and precipitation for your area. If you live in the U.S., NOAA has good climate information – including historical data - at : http://www.ncdc.noaa.gov/new-climate-information


Here is this summer's precipitation,
as measured in the garden.

As you know, precipitation can vary widely by geographic area. Consider purchasing an inexpensive rain gauge and tracking precipitation in your own backyard. Check with your neighbors. You may have a helpful neighbor with precipitation records going back years or even decades! These will provide a better indicator of your neighborhood’s precipitation than any other source.

Note the precipitation information, and its source, on your Site Summary Sheet (http://www.slideshare.net/cvadheim/physical-characteristics-of-your-site-summary)


An interesting garden includes both sun and shade

 2. Sun and Shade.

Three main factors influence how well a plant will do in a given location: soil moisture, temperature extremes and the amount of sunlight/shade. We tend to think of Colorado native plants as being ‘sun lovers’, and this is true for most plants in some plant communities (for example, desert communities). But most plant communities include a combination of sun- and shade-loving plants. The shade-lovers will be found growing in the shade of trees and shrubs, in the bottoms of canyons or forests and on north-facing slopes.

There are many degrees of shade – both in nature and in the garden (definitions are given below). The trick is to match the light requirements of the plants to those of the garden. Shade is often viewed as a deterrent to gardening, which is unfortunate. While shady areas do present unique challenges, lovely native plant gardens can be created in lower light environments. In fact, shade gardens have many special attributes and advantages.

  • The lower light intensity creates a calm, peaceful atmosphere, a restful place.
  • As the hot sun beats down, toasting the ground and wilting everything in sight, a lush green shade garden becomes a paradise, a refuge from the scorching temperatures of a summer day.
  • Shady spots are more enjoyable to work in during the heat of the summer.
  • Depending on the site and plant selection, these sites may require less watering, as there is less water evaporation.
  • In a shady garden the play of light and shade, ever-changing throughout the day and from season to season, adds to the beauty of the garden.  

Parts of Mother Nature's Montrose Garden are
 quite shady at 9:00 a.m.


Creating Your Light & Shade Map - Mapping light zones in your garden

To really understand your garden’s patterns of light requires close observation, ideally in winter, spring and summer. Mapping your garden’s light conditions means you'll need to spend some time outside in your yard. Of course, you could break this down into three or four parts over three or four days; on the other hand, this is a great opportunity to really enjoy being outside. Even if you think you know your garden, we guarantee you will be surprised by your results! And once you’ve created a good Light & Shade Map you will find it much easier to select suitable plants.

While you may be tempted to just guess at the light conditions, we highly recommend taking the more methodical approach. Our own experience taught us that while we thought we knew our gardens’ shade, we really didn’t! We found that unless you actually observe the shade patterns, you may forget crucial factors such as the shade cast by walls, umbrellas and other shade-makers; or underestimate the amount of morning sun hitting plants under your trees.

Summer and Fall shade patterns:
Mother Nature's Montrose Garden

Start with a copy of Base Map 2. You will map the shaded areas at 9:00 a.m, noon and 3:00 p.m. Note the date of the shade map since light and shade patterns vary with the season. At 9:00, noon and 3:00, draw a line roughly showing where the sun is touching still (or where the shade begins) in each area of the yard. Note also areas of Deep shade and High/dappled shade (see table below for definitions). At the end of the day you'll be able to construct your final Light and Shade Map, which maps the shade regimens for each area of the garden. See an example, below, of a Shade Map in a small garden, done on August 21st .


Bear in mind that some factors affecting sunlight patterns will change during the course of the year. So, to really understand the light patterns in your garden you may want to re-map your garden in summer and winter.


Terms commonly used to describe light conditions in the garden

Term
Description
Notes for your garden
Reflected sun with heat
A south facing wall that can break 130 F on a good day, like a south wall in Delta, Grand Junction or Cortez.
This is a pretty tough regimen for most plants.  Only sun-loving plants from desert communities can survive.
Full sun
A reflective wall in the mountains; full sun everywhere else (at least 6 hours/day).
Many plants from local Grasslands, Shrublands, Oak Woodlands, Pinyon-Juniper, and open Forest
Afternoon sun
Can be a challenge in hot gardens.   Often along walls.
Plants that can take heat – shrub & desert communities.
Morning sun
Good light; not as hot and intense as afternoon sun.   Fine for plants that like partial shade.
Ribes, Heuchera and many other north-exposure plants tolerate this exposure.  Plants from sunny canyon slopes,
High/Dappled Shade
Shade created by tall, open trees or a north-facing wall. Fairly bright light, but direct sun is minimal for any length of time.  A wonderful type of light!
Hospitable to many sun and shade loving plants from nearly all plant communities.
Part-shade/ Shade
No direct sun for at least half the day.  Darker than high shade – often on N side of taller buildings or dense trees.   Shade-loving plants.
Shade-loving plants, primarily understory plants from Oak Woodland, Riparian and Forest Communities.
Deep shade
Quite dark the entire day - for example, under very dense evergreens.  Not much grows here.
Forest floor plants that require very low-light conditions.  More likely plants from Pacific Northwest, other heavily forested regions.


Average temperatures and precipitation (ref 1)


3. Temperature and Temperature Patterns

Local temperature information is readily available on the internet for many areas. One of the best resources is US Climate Data: https://www.usclimatedata.com/. We suggest downloading a table/graph of the average monthly high and low temperatures for your local area. This will help you realistically plan your garden. It will also let you know when you’ll likely be able to plant in your area. (ref 2)

Plant Hardiness Zone for Mother Nature's
 Montrose Garden: 6b

Another important resource is the USDA Plant Hardiness Zone Map (https://planthardiness.ars.usda.gov/PHZMWeb/).  You can now access Hardiness Zone information, on the internet, by simply entering your Zip Code.  According to the USDA website (ref.3):

“Hardiness zones are based on the average annual extreme minimum temperature during a 30-year period in the past, not the lowest temperature that has ever occurred in the past or might occur in the future. Gardeners should keep that in mind when selecting plants, especially if they choose to "push" their hardiness zone by growing plants not rated for their zone. In addition, although this edition of the USDA PHZM is drawn in the most detailed scale to date, there might still be microclimates that are too small to show up on the map.”

As with precipitation, temperature can vary greatly over short distances. In fact, each garden has its own temperature microclimates, influenced by buildings, walkways, plants and physical structures as well as wind, shade and other factors. You may have already noticed areas that are warmer or cooler than the rest of the garden. You can use temperature microclimates to your advantage by planting plants that require more – or less – heat than is found in the rest of the garden.

Get out into your garden and notice the temperature patterns. If it’s summer, now is a good time to discover pockets of heat in the garden. If it’s winter, observe which areas are noticeably warmer or cooler (there may be as much as 10° F (5° C.) differences across the garden). Note the differences on your Site Summary Sheet and map the areas on your map (see example from a small garden, below).


4. Topography and Drainage

Landscape topography refers to the high and low places in the garden. High points may be as dramatic as actual hills or the tops of steep slopes. More often they are subtle, representing elevation changes of only a few feet. Low places in some gardens may include natural canyons, streambeds or the bottoms of steep slopes. In many gardens the low areas also are subtle – but they are enough to affect drainage patterns. The topography may be either natural or man-made.

Landscape topography is most important for its effects on soil moisture. You may have noticed low areas in your garden that tend to retain moisture longer – or high areas that dry out more quickly. You’ll want to take advantage of these differences in topography by planting species appropriate for the soil water conditions they provide. The first step, of course, is to map significant garden topography on your Physical Features Map (see example, below).


5. Wind Patterns

Wind can play an important role in some gardens. Some areas have high winds at certain times of the year. Other areas may have cooling mountain breezes most afternoons. Still other gardens may experience hot, dry winds in the fall or spring. All of these wind patterns may influence the type of plant that will thrive in your garden.

Wind also provides air circulation. This is often a good thing, particularly in gardens where soil moisture can provide the perfect conditions for garden fungi during warm weather. Get out in your garden and observe wind/air flow patterns over several days. Be sure to observe these patterns at different times of the day. Are there areas that are particularly breezy? Areas where the air doesn’t move at all during the day? Map these on your Physical Features Map.

Think about the yearly patterns of wind in your area. Are their times of significant high winds? Have these effected local gardens in the past? Note this also on your Site Summary Sheet. You’ll need to plan for wind when you design your garden and choose your plants.

Warm- and cool-season wind patterns:
Mother Nature's Montrose Garden

Above is a map showing the warm and cool season wind patterns in Mother Nature’s Montrose Garden.  Strong winds do blow through the garden, particularly in May/June and October.  Winter storms can also bring strong gusts.  We’ll need to consider this when choosing and placing our plants.


We do get occasional summer hail!


6. Snow and Hail 

If you live in Colorado (or any other place that gets snow and hail) you should consider these factors in planning your garden.  Fortunately, we don’t often get severe hail storms in Montrose.  If you live in an area that does, note the months and garden areas most impacted on your Site Summary Sheet.

If you live in a cold climate, snow may build up in colder (shadier) parts of your yard.   Snow may melt slower in these areas in the spring.  This information can be useful in garden planning.  If these conditions occur in your garden, note them on your Physical Features Map and Site Summary Sheet.


7. Other Physical Features

Other physical features include anything else that will influence your landscape design. These will vary greatly from site to site. One yard may have commanding vistas that should be featured in the landscape design. Another may have unsightly views which should be screened. These features (and any other physical features) should be mapped on your Physical Features Map. 


Some sites have unique physical features that could be highlighted in the garden design. These include cliffs, large rocks/boulders, natural outcrops, ponds, streambeds and many other features. You may want to design your entire garden plan around significant physical features. Include any such features on your map.

Be sure to join us next month, when we'll help you plot out the types of activities you want to do in your Colorado-friendly garden.  You might start listing things right away!


____________

  1. https://www.usclimatedata.com/climate/montrose/colorado/united-states/usco0275
  2. https://www.usclimatedata.com/
  3. USDA Plant Hardiness Zone Map, 2012. Agricultural Research Service, U.S. Department of Agriculture. Accessed from https://planthardiness.ars.usda.gov/.


 ________________________________________


We welcome your comments (below).  You can also send your questions to: monaturesmontrosegarden@gmail.com


Sunday, September 15, 2019

Creating Your Colorado-friendly Garden: 2.a - Site Assessment: Soils


Soil Survey Map: Mother Nature's Montrose Garden

In this post, we continue to explore the steps in creating a Colorado-friendly garden. For a complete list of posts in this series see: https://mothernaturesmontrosegarden.blogspot.com/p/creating-your-colorado-friendly-garden.html

As we discussed in our introduction (July, 2019), the ‘Colorado-friendly Garden’ involves designing gardens around existing conditions – what we like to think of as a site’s ‘natural assets’. While this series is aimed primarily at Colorado gardeners, the principles are applicable wherever you live; they are, quite simply, the principles behind sustainable gardening. The key point is this: get to know your garden’s ‘natural assets’, then choose plants and hardscape appropriate for these assets. The result is a healthier, more sustainable and often more interesting landscape.

Throughout this series, you’ll be developing maps, lists and worksheets specific for your garden. We suggest you create a Garden Planning Notebook to keep all these materials together in one place.  You’ll also want to include pictures of inspirational gardens, ideas about plants and hardscape – anything else that you may want to include in your final garden plan.

Soil is a complex system; it's characteristics
 have a large impact on plant health

Site physical conditions will be different for every garden; that’s why each gardener needs to discover his/her site’s own assets, before considering a garden design. Site characteristics include such things as soil type and drainage, sun and shade patterns, wind, temperature and even views (good or bad). You need to assess these site assets before you plan your garden, so you can take advantage of them. This post and the next will walk you through the process.

Several physical characteristics have the most effect on plant suitability and plant health. These include: soil texture and drainage; precipitation and precipitation patterns; the amount of light (sun and shade); temperature; and wind. We discuss each of these in a separate section. You will find there’s lots to learn about your garden – information that will actually make your gardening easier.

By the end of this exercise (end of September) you will know a lot more about your site. You will carefully observe conditions in your yard; you’ll also conduct some simple tests. We suggest you complete several summary sheets with key information about your site. The summary sheets are available at:


You will also create several maps that will help you design your garden on a solid basis: a soils map (if needed); a sun and shade map; and a map (or two) with other physical features. If you don’t yet have a good base map for your garden, see our July (2019) postings on Creating a Base Map.


Simple soils tests help you understand
 your soil's characteristics


Soil type and drainage.

Soil is truly a garden’s foundation.  Plants obtain water and many nutrients from the soil – and interact with soil organisms.  Soil conditions may also limit the types of plants you can grow successfully.  The more you know about the characteristics of your soil, the better you can match plants and watering methods to your unique soil conditions.

A well-developed soil is a complex ecosystem.  When people talk about soils, they’re usually referring to the inorganic part of the soils – the sand, silt and clay particles.  But a good soil contains much more.  It has pores which hold vital air and water.  It contains decomposing organic matter (old roots; decayed leaves; etc.) that provide plant nutrients and help retain soil moisture.  And it’s home to a whole world of soil organisms, ranging in size from gophers and earthworms to microscopic bacteria and fungi.  In fact, a good soil is literally teeming with life!

Soils are characterized by the parent material (rock) from which they were formed and the conditions of their formation. In western Colorado, most of our soils were either deposited by ancient shallow seas and/or from stream erosion from local mountains.  Many local soils, particularly in agricultural regions are loams and clay loams.  But there are regional differences that may affect your garden.  If you’d like to learn more about the original (native) soils for your local area we suggest the following resources:


Urban soils – including those in our gardens - are more complex than native soils. In fact, urban soils are among the most difficult to classify – and work with – of any soils world-wide.  Like all soils, urban soils are composed of a parent rock material that has weathered over time to produce soil.  But it’s the human effects that make urban soils so ‘difficult’.  Soil scientists are just beginning to get a true understanding of the differences between urban and native soils – and their effects on plant growth.  To learn more about urban/suburban soils, see: http://mother-natures-backyard.blogspot.com/2012/09/getting-to-know-your-gardens-soil-urban.html.

After precipitation, soil type and drainage have the most effect on plants. Two key characteristics that effect plant health are soil drainage and soil fertility.  Interestingly, both characteristics are influenced by the types/sizes of the particles that make up a soil – the physical characteristics of the soil.  You may suspect that you have a loam or clay soil, since both are common in our area.  In general, the following are true:

  • Sandy soils - have larger soil particles that allow them to drain well.  They also dry out more quickly and tend to leach out their nutrients.  If your soil is sandy, you’ll need to water more frequently in summer.
  • Clay soils - have smaller soil particles that retain water and soil nutrients better.  They also tend to drain more slowly, which can create problems for some water-wise plants.  If your soil is clay, you’ll need to water less frequently to avoid over-watering.
  • Loam soils – have a balance of sand, clay and intermediate size (silt) particles.   They are best for retaining water and nutrients – in fact, they are ideal soils.  Loam soils are more common than you think in our area.

You may already think you know your soil type. But until you test, you won’t really know.  Here are some Simple Soil Tests to help you get to know your garden soil better:  http://mother-natures-backyard.blogspot.com/2012/10/getting-to-know-your-gardens-soil.html 


Much soil profile data is available on-line. 
But conditions in your garden may differ, due to past
 usage and gardening practices

Soil depth

Some poorly drained soils have a dense layer that keeps water from draining.  This may be a true ‘hardpan’ clay layer, a rock layer or just a compacted zone.  You can often detect a dense layer by digging down until you cannot dig further.  A depth of less than 20 inches means you have a shallow soil.  You may want to break up the impervious layer (or drill holes through it) to improve drainage.


Soil pH

Soil pH influences the availability of soil nutrients to your plants.  Most local garden soils have a pH from about 7.0 to 8.0 or higher.  An ideal soil for many plants (including vegetables) is around 7.0. But there are many native plants that like a soil pH between 7.5 and 8.0 (‘basic’ soils).  Some local native plants even thrive in very alkali soils (pH > 8.0).  If you’re having difficulty getting plants to grow – or if you want to plant ‘acid-loving’ plants - you can test your soil pH with a simple test kit (available at most garden centers and plant nurseries). There are also electronic meters that measure pH; we have one that also measures soil moisture and available light (see above)


Soil basic nutrients

Many Colorado native plants have low fertilizer needs; other plants (including vegetables and some non-native plants) have higher nutrient needs.  Simple test kits that indicate levels of the basic nutrients (nitrogen; potassium; phosphorus) are available at most garden centers.  These kits are inexpensive and easy to use - just follow the directions on the kit. Most kits indicate whether the levels of nitrogen, potassium and phosphorus are low, adequate or high.  That’s usually good enough for most gardens.  For more on soils testing, see references 1-3, below.  

If you want to learn more about your soil’s nutrients you can send a soil sample to a soil testing lab.  These labs can measure additional nutrients - and with greater precision than simple test kits.  One of the most reasonably priced labs is at Colorado State University (http://www.soiltestinglab.colostate.edu/), where a basic soils analysis is $35.00.  Another good lab which offers garden soils analysis is Midwest Laboratories (https://midwestlabs.com/consumer-estore-2/consumer-estore-garden/).  The University of Massachusetts Center for Agriculture also offers basic soils testing. (http://soiltest.umass.edu/).   Visit the websites to learn more about the tests available, prices, etc.


Testing soils: Mother Nature's Montrose Garden


We’ve learned a lot about the soils in Mother Nature’s Montrose Garden this month. After testing several places in the garden we know that:

  • Our soil is clay-loam (Mack clay loam) throughout. The soils are primarily stream terrace soils.
  • Our soils are deep, with no hardpan
  • Our soils are well-drained
  • Our pH in most of the garden is 7.8 to 8.0
  • Our soils have average levels of key soil nutrients (N/P/K)


After you complete your own soil and drainage evaluation, we suggest you complete the soils summary sheet (http://www.slideshare.net/cvadheim/soil-characteristics-of-your-site-summary) and place it in your Garden Planning Notebook.  And we hope you join us later in the month, when we consider other physical features that influence your garden.

_________________

  1. http://websoilsurvey.nrcs.usda.gov/app/
  2. http://www.rain.org/global-garden/soil-types-and-testing.htm
  3. ftp://ftp-fc.sc.egov.usda.gov/NSSC/Educational_Resources/concepts2.pdf


We welcome your comments (below).  You can also send your questions to: monaturesmontrosegarden@gmail.com


Wednesday, September 4, 2019

Plant of the Month (September) : Blue (Mexican) Elderberry - Sambucus nigra ssp. cerulea


Blue elderberry (Sambucus nigra ssp. cerulea): 
Mother Nature's Montrose Garden, Montrose CO


For many of us, summer is the season of the elderberry.  Between bird visitors, fragrant flowers and ripe berries it’s hard to beat our native Blue Elderberry.  And even though our plant is very young (about two years; one in the ground), if you look closely you can see both flowers and a few berries this summer. 

The taxonomy of Blue Elderberry (sometimes also called Mexican Elderberry) has been the subject of some debate.  While confusing to the home gardener, this debate results from a genuine interest in classifying the species correctly.   As of 2019, the consensus opinion recognizes two variants of native North American ‘dark elderberries’: Sambucus nigra L. ssp. canadensis (American Black Elderberry; mostly east of the Rockies) and Sambucus nigra L. ssp. cerulea (Raf.) R. Bolli (our western Blue Elderberry). The scientific name is pronounced sam-BEW-kus NIE-gruh ser-U-lee-uh.  The Elderberries are members of the Adoxaceae (Muskroot) Family); they were formerly placed in the Caprifoliaceae (Honeysuckle) Family.


Blue elderberry (Sambucus nigra ssp. cerulea):
 S. California


Blue Elderberry has previously been called Sambucus cerulea, Sambucus caerulea, Sambucus mexicana, Sambucus glauca, Sambucus neomexicana, Sambucus velutina and several other scientific names.   Some of the taxonomic confusion doubtless reflects its wide distribution in western North America, from southwestern Canada to northern Mexico.  Widely distributed species are sometimes known by different names due to historical reasons.  But there are regional differences in Blue Elderberry’s appearance.  Some botanists and nursery people feel that ‘lumping’ them all together has obscured genuine biologic differences; so the taxonomy may change yet again in the future.  For now, just remember that you may encounter Blue Elderberry under any of the above names.


Blue elderberry (Sambucus nigra ssp. cerulea): 
after fire, San Miguel County, CO


Where ever it occurs in the West, Blue Elderberry grows in moister areas within more dry surrounding habitats – or drier, more open areas in woodland habitats.  Blue Elderberry grows where its roots can access deeper water.  It’s not uncommon to find Blue Elderberry growing on river banks (a bit away from the water) or on slopes that get a little extra winter/spring water.  It grows in all counties of Utah and Arizona, most counties of New Mexico, and just a few counties of Colorado, at elevations under about 8000 ft (2400 m.). [1] The photo above comes from San Miguel County, at an elevation of about 7500 ft.


Blue elderberry (Sambucus nigra ssp. cerulea):
 winter die-back

Blue elderberry (Sambucus nigra ssp. cerulea):
 mature shrub form


In areas with cold winters, most of the new growth dies back each winter.  The cycle of winter die-back and spring re-growth produces a large shrub 6-8 ft. tall and wide. Plants add new sprouts each year, and increase in size with age.  In areas with mild winters (like Southern California), Blue Elderberry can become much larger, ranging from a very large shrub (8-12 ft tall and 8-15 ft wide) to a small tree.  With optimal water it becomes a nice sized tree up to 20-25 ft tall with a respectable trunk (see below).  While Blue elderberry is reported to have a relatively short life (20 years or so), in S. California, trees live much longer (50-100 years). 


Blue elderberry (Sambucus nigra ssp. cerulea):
 old tree, Palos Verdes peninsula, S. California


Blue Elderberry is winter- and drought-deciduous, losing its leaves for several months of the year.  In most home gardens in Western Colorado, the leaf drop occurs in fall – usually sometime between mid-October and November in our area.  Under drier conditions, plants may lose their leaves as early as late summer.   Elderberries begin to grow when the soil warms up in spring – usually April or early May in the Montrose area.  It then grows rapidly to full size by mid-summer (see photos below).


Several features make Blue Elderberry an attractive plant.  Even in winter, its furrowed, red-brown bark provides interest in the wilds or in a garden.  The bark contrasts nicely with the pale green color of the leaves when plants are leafed out.  The leaves are compound - made up of several leaflets – and somewhat succulent.  Overall, the foliage has a lacy appearance, although the shade under an Elderberry tree/shrub can be anything from dappled to quite dense depending on how the plant has been pruned.


Blue elderberry (Sambucus nigra ssp. cerulea): leaf
Blue elderberry (Sambucus nigra ssp. cerulea):
 flower clusters
Blue elderberry (Sambucus nigra ssp. cerulea):
 close-up of flowers


Elderberry has small, cream/yellow flowers growing in dense clusters, mostly at the ends of branches.  Elderberries can begin flowering as early as July and may flower off and on throughout the summer.   The flowers have a wonderful aroma – somewhat like spiced honey – that perfumes the air on warm summer days.  This is just one of the benefits of using Blue elderberry as a shade tree.   If you like the scent, you can use the flowers to make elderflower tea, syrup and even jelly.  Just collect ripe flower clusters (your nose is your best cue), remove the green stems, wash with cool water, then cover with hot (almost boiling) water.   After about 10 minutes you can strain out the flowers and drink the ‘tea’ or use it to make syrup or jelly. 


Blue elderberry (Sambucus nigra ssp. cerulea):
 elderflower makes delicious jelly

Blue elderberry (Sambucus nigra ssp. cerulea): fruits


The berries for which Blue Elderberry is famous start out small, hard and green. In the warm summer months, they grow, turning first a dark (almost black) purple, then soft and blue when fully ripe (hence the common name).  The blue color is due to a waxy ‘bloom’ that covers the berries.   Most Elderberry trees/bushes have a ‘main ripening event’ sometime in summer (August or September) with additional clusters ripening before or after.  

Blue elderberry (Sambucus nigra ssp. cerulea):
fruits and insects attract Audubon's & other warblers 


Blue Elderberry is a good habitat plant for the home garden.  It’s large enough to provide perches and cover for birds.   In summer and fall, a wide range of birds eat the fruits/seeds including finches, warblers, jays, orioles, bluebirds, grosbeaks and the Northern Mockingbird.  Some migratory birds seem to prefer the dried berries over the fresh.  In the wild, the foliage is browsed by deer and elk.   Our most common pollinator seems to be the European Honey Bee.   But you’ll also see some native bees, flower flies and other potential pollinators visiting the flowers. 


Blue elderberry (Sambucus nigra ssp. cerulea):
European Honeybee pollinator


Blue Elderberry is hardy to USDA Zone 4.  It can be grown in soils ranging from quite sandy or gravelly to fairly dense clays.  It doesn’t like salty soils or seaside conditions; and it prefers at pH between 7.0-7.5 (but will take soils with a slightly higher pH).  It likes sun, but can tolerate some shade.  Established Elderberries are quite drought tolerant, but they produce best – and keep their leaves through the fall – if given an occasional deep watering in summer.


Blue elderberry (Sambucus nigra ssp. cerulea):
 makes a nice chade tree


Blue Elderberry makes a nice addition to the home garden.  With a little yearly pruning, it can make a nice shade tree in warmer climates (see above).    Elderberries are also valuable plants for slopes and stream banks.  If you have a large property, they make a lovely large shrub that requires little effort.  It can be used as a summer accent or included in a mixed hedge or hedgerow.  Plants will be most productive if the oldest stems are pruned out each year in late winter.


Blue elderberry (Sambucus nigra ssp. cerulea): in
 mixed hedgerow, Mother Nature's Montrose Garden


Elderberries take a few years to become established.  In our experience, the establishment period takes longer in sandy soils (3 to 4 years) than it does in clay soils (about 2 years).   During the establishment phase, the plant spends most of its energy establishing roots; the above-ground growth can be slower than many gardeners expect.  Never fear - patience is all that’s required.  Once established, your Elderberry will grow quickly and can be selectively pruned to a more tree-like shape (see http://mother-natures-backyard.blogspot.com/2012/08/plant-of-month-august-blue-mexican.html for more on pruning to a tree shape).  In colder climates, Blue elderberry will form a large, dense shrub in 3-4 years.

Blue elderberry (Sambucus nigra ssp. cerulea): Yearly photos
Mother nature's Montrose Garden, CO


Blue elderberries are a favorite food among native peoples where ever they grow.  The fruits are high in potassium, have three times the protein of blueberries, and are rich in vitamin C, calcium, beta-carotene and phosphorus. [2]   The berries are quite tart until cooked and sweetened. It’s best to cook or dry berries before eating; too many raw berries can make you sick! Blue elderberries make a distinctively-flavored jelly, syrup or cordial. They are also used to make wine, sauces and to flavor candy.  They can be dried and used for herbal tea.  Re-hydrated dried berries (or fresh) can also be used in baked goods. For hints on harvesting, cleaning and preparing Elderberries see: http://mother-natures-backyard.blogspot.com/2012/08/picking-cleaning-and-processing.html.  For some of our favorite Elderberry recipes, see: http://mother-natures-backyard.blogspot.com/2012/08/elderberry-recipes.html .


Blue elderberry (Sambucus nigra ssp.
 cerulea): jelly-making


Native peoples used the hollow stems of  Elderberry to make flutes, blow-guns and clapper sticks (a type of percussion instrument used to beat the tempo during songs and dances).  The straight stems were also used for arrow shafts, pegs and combs.    A dark gray dye was prepared from the berry stems to dye basketry materials.  A dye can also be made from the bark. The dried leaves were used as an insecticide.

Blue Elderberry was also used extensively as a medicinal plant.  A wash prepared from flowers or leaves was used on skin sores, bruises and as a skin conditioner.  Tea from the flowers is still used as a tonic and to fight colds.   All parts of Blue Elderberry make plant chemicals that may cause nausea and diarrhea if eaten.  Berries should be ripe – and should be cooked – to insure they are safe to eat.  Elderflower tea is mild, but should be used in moderation.    Be sure that the berries are Blue Elderberries – the berries of Red Elderberry – and the leaves of all elderberries - ARE TOXIC AND SHOULD NOT BE EATEN.

In summary, Blue elderberry is a wonderful garden plant that isn’t used enough in Colorado gardens.  It has much to recommend it, from its dense foliage, sweet flowers and edible berries.  It’s a fantastic bird habitat plant; one of the best you can grow to attract a wide range of fruit- and insect-eating birds.  And it is a plant with a long history in the Four Corners states.  Growing it links you to native peoples and settlers who have used this plant for thousands of years.

Blue elderberry (Sambucus nigra ssp. cerulea):
 group picking elderberries


The only drawback is that Blue elderberry is not widely available in nurseries – even the local native plant sources.  It can be mail-ordered from Native Foods Nursery - https://nativefoodsnursery.com/fruit-trees/blue-elderberry/.  If all else fails, you can plant the other sub-species: Sambucus nigra L. ssp. canadensis (American Black Elderberry), which also grows wild in Colorado.  There are several nice cultivars of the American Black Elderberry, some of which are more widely available.  Just remember to choose a cultivar of the American Elderberry; some plants sold in nurseries are cultivars of the European Black Elderberry.

________________________________

  1. https://www.swcoloradowildflowers.com/White%20Enlarged%20Photo%20Pages/sambucus%20nigra.htm
  2. http://www.harlequinsgardens.com/mikls-articles/elderberry-shrub-food-and-medicine/


For a gardening information sheet see: https://www.slideshare.net/cvadheim/gardening-sheet-sambucus-caerulea-169137161


We welcome your comments (below).  You can also send your questions to: monaturesmontrosegarden@gmail.com